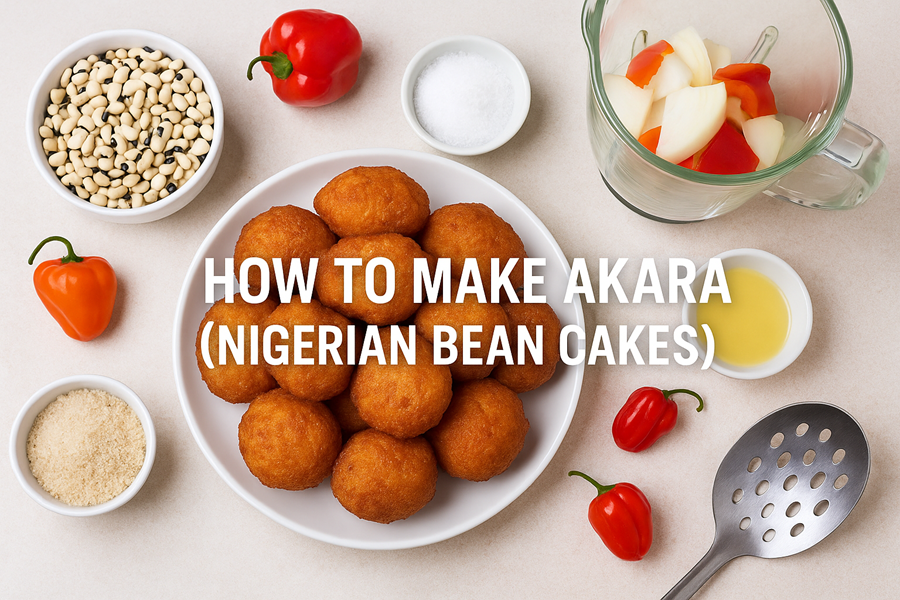
Learn How to make Akara that is crispy outside, fluffy inside, and irresistibly delicious! This detailed guide covers ingredients, equipment, expert tips, variations, nutrition, health benefits & FAQs—perfect for Nigerian breakfast lovers.
Introduction🍳
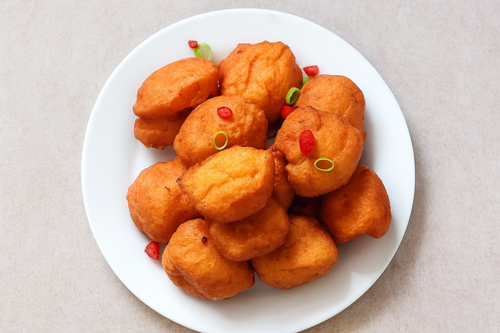
Akara — also known as Nigerian Bean Cakes or Nigerian Bean Fritters — is one of West Africa’s most iconic breakfast foods. These golden, crispy, fluffy fritters are made from peeled black-eyed peas blended with peppers, onions, and spices, then deep-fried to perfection.
Whether you’re learning how to make Akara at home for the first time or simply perfecting your technique, this guide will give you everything you need for authentic, street-style Nigerian deliciousness.
Akara is a beloved Nigerian breakfast food made from ground beans mixed with spices, then deep-fried into round, crispy fritters. It’s popular across West Africa, with variations in Ghana, Sierra Leone, and Cameroon. While it’s typically enjoyed in the mornings, it’s also a satisfying snack any time of day. Mastering how to make Akara means unlocking one of West Africa’s most iconic comfort foods.
Table of Contents
⭐Why You Will Love This Akara Recipe
You’ll fall in love with this Nigerian bean fritters recipe because:
🌟 Crispy on the outside & fluffy inside — the perfect texture balance
💪 Packed with plant-based protein from black-eyed peas
🔥 Uses only simple, affordable Nigerian ingredients
🍽️ Perfect for breakfast, brunch, snacks, or “Akara burger” with Agege bread
🥰 Deeply nostalgic — just like roadside Akara from Nigerian streets
⏱️ Quick, once the beans are peeled
✨ Customisable with peppers, herbs, crayfish, or spices
If you enjoy Nigerian breakfast foods such as Moi Moi, Pap, or Yam, you’ll love mastering how to make Akara — a true comfort classic.
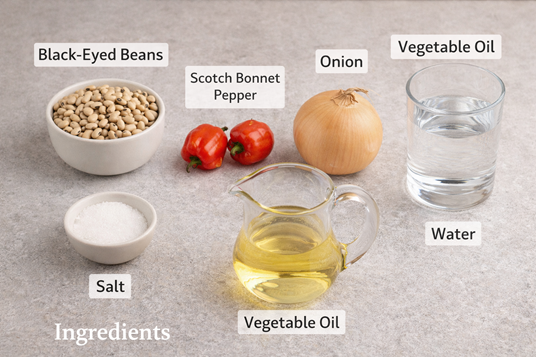
🍽️Ingredients You’ll Need
- 2 cups black-eyed peas (peeled)
- 1 medium onion (chopped)
- 2 scotch bonnet peppers (adjust to heat preference)
- 1 red bell pepper (optional for colour & flavour)
- Salt to taste
- ½ teaspoon seasoning powder (optional)
- Vegetable oil (for deep-frying)
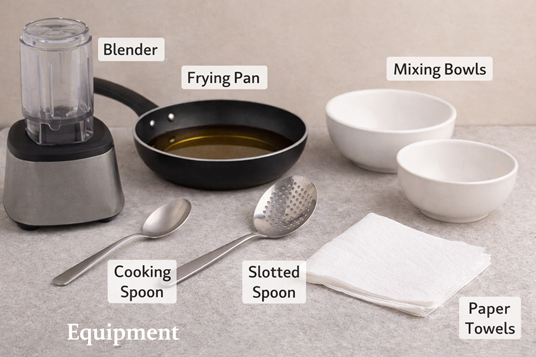
🛠️Equipment Needed
- Blender
- Large bowl
- Deep frying pan or pot
- Slotted spoon
- Ladle or scoop
- Paper towels (for draining)
👩🏽🍳Step-by-Step: How to Make Akara
Step 1: Prepare & Peel the Beans
- Rinse black-eyed peas thoroughly to remove dirt.
- Soak in water for 6–8 hours (or overnight).
- Rub between your palms to peel the skins.
- Rinse off until skins are completely removed.
Peeling is essential for smooth, fluffy Nigerian bean cakes.
Step 2: Blend into a Smooth Paste
- Drain the soaked beans and add them to a blender.
- Add just a little water — only enough to blend.
- Add onions, scotch bonnet, and bell pepper.
- Blend until thick, smooth, and consistent.
💡Do NOT add too much water — it will make the Akara flat instead of fluffy.
Step 3: Season & Whisk for Fluffiness
- Transfer the mixture into a large bowl.
- Add salt and optional seasoning.
- Whisk vigorously for 5–7 minutes with a wooden spoon.
This step incorporates air — the secret to soft, airy bean fritters.
Step 4: Heat the Oil
- Pour enough vegetable oil into a deep pan to submerge the Akara.
- Heat over medium-high heat.
- Test the oil by dropping a small spoonful of batter; it should rise and sizzle.
Step 5: Fry the Akara
- Scoop small portions of the batter using a ladle.
- Gently drop into the hot oil (don’t overcrowd the pan).
- Fry until golden brown, flipping halfway (about 3–5 minutes per side).
- Remove with a slotted spoon and drain on paper towels.
Now you’ll see why mastering how to make Akara gives you perfect golden puffs every time.
Step 6: Serve & Enjoy
Akara is best enjoyed hot and fresh. Serve with:
- Pap (ogi)
- Custard
- Garri soaked in cold water
- Agege bread (“Akara burger”)
- Ketchup, pepper sauce, or any dip you love
💡Expert Tips for the Perfect Akara
✔️ Do not over-blend — keep the batter thick
✔️ Whisk to incorporate air for fluffy results
✔️ Keep oil temperature steady
✔️ Fresh beans produce a better texture than canned beans
✔️ Fry in batches to prevent soggy Akara
🌶️Variations You Can Try
Make your Akara more flavourful with:
- Chopped bell peppers
- Fresh herbs (parsley, basil)
- Crayfish (Southwestern Nigerian twist)
- Garlic or ginger
- Seasoning cubes
- Spring onions
Every region has its own style — experiment and enjoy!
📊Nutritional Information (Per 2–3 Pieces)
| Nutrient | Amount |
|---|---|
| Calories | 165 kcal |
| Carbohydrates | 18 g |
| Protein | 9 g |
| Fat | 7 g |
| Fiber | 6 g |
| Sodium | 130 mg |
🔗 Source: USDA FoodData Central – Black-Eyed Peas↗
❤️Health Benefits of Akara
- High in Plant Protein: Supports muscle growth and energy.
- Rich in Fiber: Helps digestion and promotes heart health.
- Low Glycemic Index: Supports stable blood sugar levels.
- Packed with Vitamins & Minerals: Includes iron, magnesium, folate, and B-vitamins.
- Healthy Fats (depending on oil used): Use heart-friendly oils for better nutrition.
Note: The information provided in this blog post is for educational purposes only and is not intended as medical advice. Always consult with a healthcare professional before making significant changes to your diet.
Frequently Asked Questions (FAQ)🙋🏽♀️
1. Can I make Akara without peeling beans?
👉It’s possible, but the texture won’t be smooth. Peeling beans is essential for authentic Nigerian bean cakes.
2. Can I bake Akara instead of frying?
👉Yes, you can try baking, but it won’t have the same crispy edges as traditional fried bean fritters.
3. What can I serve Akara with?
👉It pairs perfectly with pap (ogi), custard, bread (“Akara burger”), or garri soaked in water.
4. Can I store leftover Akara?
👉Yes! Store in an airtight container in the fridge for up to 2 days. Reheat in an oven or air fryer for best results. If you follow these storage tips, you’ll still enjoy your Akara as if freshly made—just another trick in learning how to make Akara at home.
- How To Make Fried Plantain — An Irresistibly Golden, Powerful, And Joy-Filled Classic 🍌
- How To Make Boiled Plantain – A Powerful, Comforting, And Foolproof Nigerian Favorite 🍌✨
- How To Make Koko (Millet Pap): A Powerful, Comforting, And Nourishing Nigerian Breakfast Delight🥣
- How To Make Tuwo Masara – A Powerful, Comforting & Irresistibly Authentic Nigerian Delight 🌽
- How To Make Osumada Soup – A Powerful, Comforting Nigerian Classic You’ll Love 🌟🍲

Did you make this recipe? Please do leave a comment and rating on the blog. Tag us on Pinterest @9jakitchen and Instagram @real9jakitchen and follow.

