
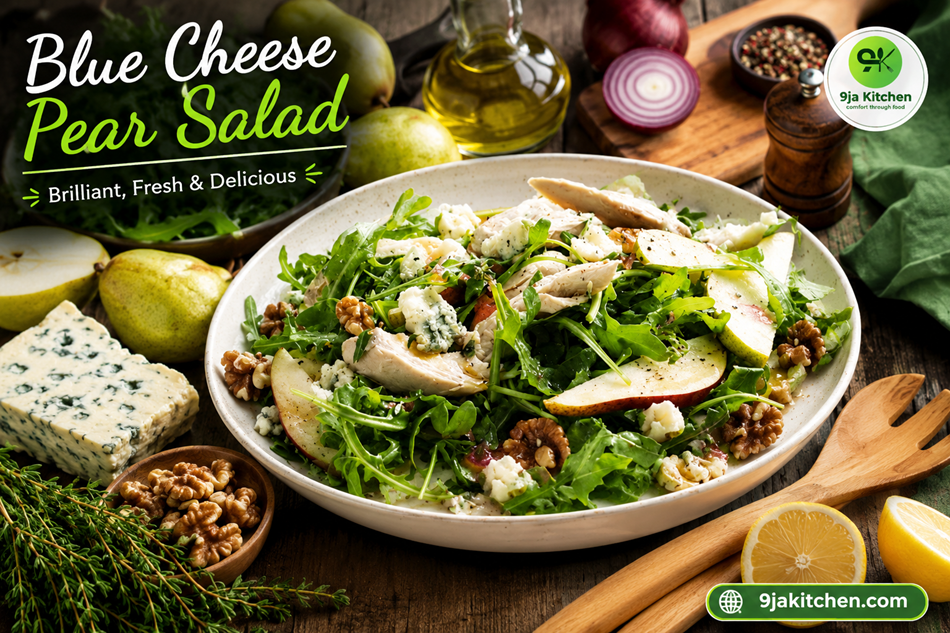

Make a delicious Blue Cheese Pear Salad with juicy pears, creamy blue cheese, crunchy walnuts, rocket and tender poached chicken.
There is something wonderfully exciting about a salad that brings together sweet, savoury, creamy and crunchy flavours in one colourful bowl. This Blue Cheese Pear Salad does exactly that, combining juicy fresh pears, peppery baby rocket, creamy blue cheese and toasted walnuts with tender poached chicken for a satisfying meal that feels both elegant and wonderfully simple. The inspiration for this recipe comes from the flavour combination featured by Taste, where pear, blue cheese, walnuts, rocket and poached chicken are brought together with a bright lemon and thyme dressing.
The beauty of this Blue Cheese Pear Salad is its balance. The natural sweetness of ripe pears softens the bold, tangy character of blue cheese, while roasted walnuts add irresistible crunch. Peppery rocket brings freshness, and gently poached chicken provides lean protein without making the dish feel heavy. It is a fantastic example of how simple ingredients can create a restaurant-style salad at home.
Whether you are searching for healthy salad recipes, an impressive lunch idea, or an easy dinner that does not require complicated techniques, this Blue Cheese Pear Salad deserves a place on your table. It works beautifully as a light main meal, a sophisticated starter, or part of a larger spread. Best of all, the components can be prepared ahead, making this Blue Cheese Pear Salad especially useful when entertaining.
Table of Contents
💚 Why You’ll Love This Recipe
- 🍐 Beautiful Sweet-Savoury Balance: The sweetness of ripe pears contrasts beautifully with the salty, tangy flavour of blue cheese.
- 🧀 Big Flavour With Simple Ingredients: This Blue Cheese Pear Salad delivers gourmet flavour without complicated cooking.
- 🥗 Fresh And Colourful: Green rocket, golden pears, creamy cheese and toasted walnuts create an inviting presentation.
- 🍗 Packed With Protein: Tender poached chicken turns the salad into a satisfying meal.
- 🌰 Delicious Crunch: Roasted walnuts provide texture that makes every mouthful more interesting.
- 🍋 Bright Homemade Dressing: Lemon, thyme, red onion, caster sugar and olive oil create a lively dressing that brings everything together.
- ⏱️ Perfect For Entertaining: Much of the preparation can be completed before serving.
- 🌿 Adaptable: You can easily transform this Blue Cheese Pear Salad to suit different dietary preferences and occasions.
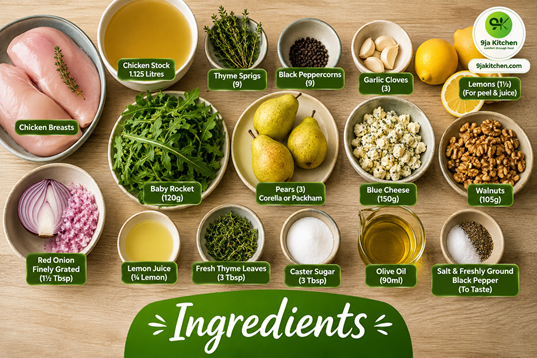
🍐 Ingredients Needed – Serves 6
🍗 For The Poached Chicken
- 🍗 1.2kg Chicken Breasts: Use boneless, skinless chicken breasts for tender, lean meat that is easy to shred or slice.
- 🌿 9 Thyme Sprigs: Fresh thyme gently perfumes the poaching liquid with a subtle herbal flavour.
- ⚫ 9 Black Peppercorns: These add gentle spice and depth without overpowering the chicken.
- 🧄 3 Garlic Cloves: Bruise the garlic lightly to release its flavour into the stock.
- 🍋 1½ Lemons: Use the peel for the poaching liquid and reserve the juice for the dressing.
- 🍲 1.125 Litres Chicken Stock: A flavourful stock keeps the chicken moist and gives it a delicious savoury character.
🥗 For The Salad
- 🥬 120g Baby Rocket: Peppery rocket provides a fresh green base for this Blue Cheese Pear Salad.
- 🍐 3 Small Corella or Packham Pears: Choose ripe but firm pears, so they hold their shape when thinly sliced.
- 🧀 150g Blue Cheese: Crumble your favourite blue cheese over the salad for a creamy, tangy finish.
- 🌰 105g Walnuts: Roast the walnuts before chopping to intensify their flavour and add satisfying crunch.
- 🧅 1½ Tablespoons Finely Grated Red Onion: This adds a mild sharpness to the dressing.
- 🍋 ¾ Lemon, Juiced: Fresh lemon juice gives the dressing brightness and acidity.
- 🌿 3 Tablespoons Fresh Thyme Leaves: Fresh thyme complements both the pears and blue cheese.
- 🍬 3 Tablespoons Caster Sugar: A small amount balances the acidity of the lemon and the savouriness of the cheese.
- 🫒 90ml Olive Oil: Extra-virgin olive oil creates a smooth dressing and carries the other flavours beautifully.
- 🧂 Salt and Freshly Ground Black Pepper: Season carefully to bring all the flavours into focus.
🔪 Equipment Needed
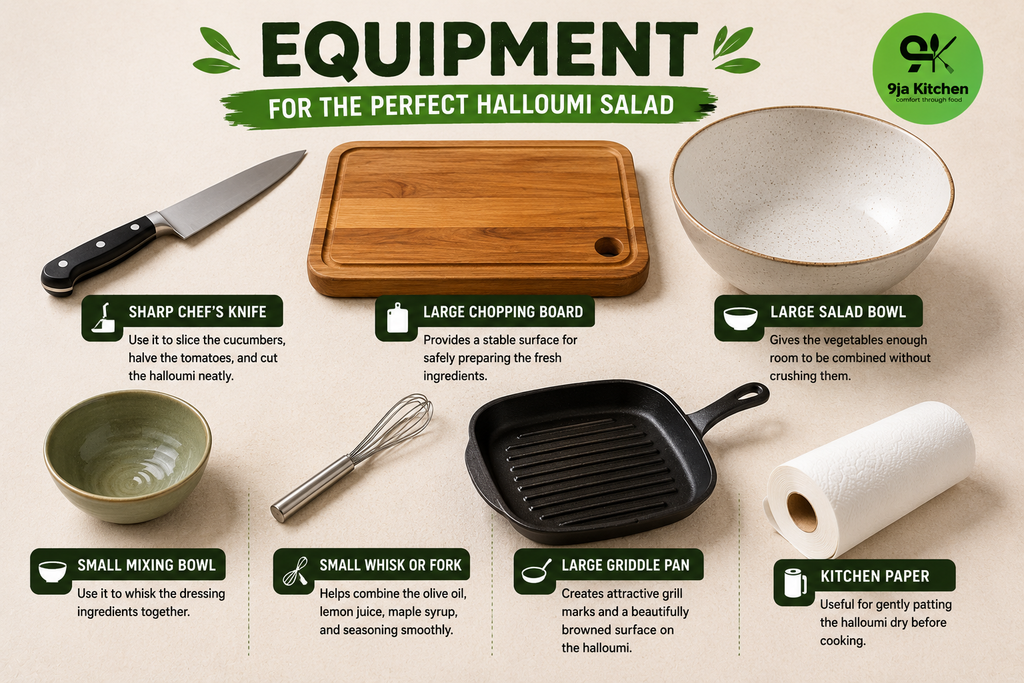
- 🍳 Large Deep Frying Pan: Use it to gently poach the chicken in the aromatic stock.
- 🥣 Large Salad Bowl: Gives the rocket, pears, chicken, cheese, and walnuts plenty of room to combine without crushing the ingredients.
- 🥄 Small Mixing Bowl: Use it to whisk the lemon-thyme dressing until emulsified.
- 🥄 Whisk: Helps combine the oil, lemon juice, sugar, onion, and herbs into a balanced dressing.
- 🔪 Sharp Chef’s Knife: Essential for slicing the pears and preparing the other ingredients neatly.
- 🪵 Large Chopping Board: Provides a stable surface for preparing the chicken, pears, and walnuts.
- 🥄 Slotted Spoon: Makes it easy to lift the poached chicken from the stock while leaving the liquid behind.
- 🧻 Kitchen Paper: Use it to drain excess liquid from the cooked chicken before slicing or shredding.
👩🍳 Step-By-Step Guide: How To Make Blue Cheese Pear Salad
Cooking Instructions:
Follow these detailed steps carefully to make perfect Blue Cheese Pear Salad every single time.
🍗 Step 1: Prepare The Poaching Liquid
- Place the chicken breasts in a large, deep frying pan.
- Add the thyme sprigs, black peppercorns, bruised garlic, strips of lemon zest, and chicken stock.
- Bring the liquid gently to the boil over medium-high heat.
- Once boiling, reduce the heat to medium.
- Cover the chicken with a round piece of baking paper and allow it to simmer gently for 5 minutes.
🔥 Step 2: Finish Cooking The Chicken
- Carefully turn each chicken breast over using tongs.
- Replace the baking paper and continue cooking for approximately 8 minutes, or until the chicken is completely cooked through.
- Remove the pan from the heat.
- Allow the chicken to stand in the poaching liquid for 5 minutes.
- Remove the chicken with a slotted spoon and place it on kitchen paper to drain.
- Allow it to cool slightly before slicing or gently shredding into large strips.
This gentle poaching method is particularly useful for a chicken pear salad because it keeps the chicken tender rather than dry.
🍋 Step 3: Make The Dressing
- Place the finely grated red onion in a small bowl.
- Add the fresh lemon juice, thyme leaves, and caster sugar.
- Pour in the olive oil.
- Whisk vigorously until the ingredients are thoroughly combined.
- Season with salt and freshly ground black pepper.
- Taste and adjust the seasoning if necessary.
The result is a bright dressing that cuts through the richness of the blue cheese while complementing the fruit.
🍐 Step 4: Prepare The Pears
- Wash and dry the pears thoroughly.
- Cut each pear in half lengthways.
- Remove the cores carefully.
- Slice the pears thinly and evenly.
- Keep the slices relatively close together until you are ready to assemble the salad.
For the best fresh pear salad, use pears that are ripe enough to taste sweet but firm enough to retain their texture.
🌰 Step 5: Toast And Chop The Walnuts
- Place the walnuts in a dry frying pan over medium heat.
- Toast them gently for several minutes, stirring frequently.
- Remove them as soon as they become fragrant.
- Allow them to cool before roughly chopping.
Do not over-toast the walnuts, as burnt nuts can introduce a bitter flavour to your Blue Cheese Pear Salad.
🥗 Step 6: Assemble The Salad
- Place the baby rocket into a large salad bowl.
- Add the sliced pears, crumbled blue cheese, and roasted walnuts.
- Season lightly with salt and pepper.
- Add the sliced or shredded poached chicken.
- Pour over the lemon and thyme dressing.
- Gently fold and toss everything together.
Be gentle during this stage. You want the pear slices and blue cheese to remain visually distinct rather than becoming crushed.
✨ Step 7: Serve Immediately
- Divide the Blue Cheese Pear Salad between six serving bowls or plates.
- Scatter a few additional walnut pieces over the top if desired.
- Add a final crumble of blue cheese for an attractive finish.
- Serve immediately while the rocket is fresh and crisp.
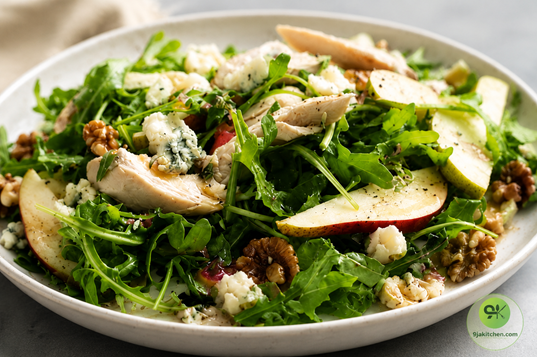
✅Your Blue Cheese Pear Salad is ready to enjoy!🎉
💡 Tips For A Perfect Result
- 🍐 Choose Firm-Ripe Pears: Very soft pears can collapse when tossed, while underripe pears may lack sweetness.
- 🧀 Choose Your Blue Cheese Carefully: A milder blue cheese is ideal if you prefer subtle flavour, while stronger varieties create a more pronounced blue cheese salad.
- 🔥 Toast The Walnuts: This small extra step makes a noticeable difference to the flavour of your pear salad with walnuts.
- 🍗 Avoid Overcooking the Chicken: Gentle poaching helps create moist, tender meat for the finished salad.
- 🍋 Taste the Dressing: Adjust the lemon, sugar, salt, and pepper before adding it to the salad.
- 🥗 Dress Just Before Serving: This keeps the rocket crisp and prevents the salad from becoming watery.
- 🔪 Slice Pears Evenly: Thin, consistent slices make the easy pear salad look more polished.
- 🌿 Use Fresh Thyme: Fresh herbs give the dressing a much brighter flavour than dried thyme.
- 🧀 Do Not Overdo the Cheese: Blue cheese has a strong personality, so a moderate amount allows the pear and rocket to shine.
- 🌰 Cool Toasted Walnuts: Let them cool before adding them so they do not wilt the rocket.
🍽️ Serving Suggestion
- Serve this Blue Cheese Pear Salad as a light lunch, elegant dinner or impressive starter. It makes an excellent gourmet salad recipe for entertaining because the colours look beautiful on a wide serving platter.
- For a larger meal, serve it alongside crusty wholemeal bread, roasted vegetables or a simple grain dish. It can also be presented as part of a buffet with other delicious salad recipes.
- For autumn entertaining, this autumn salad recipe is particularly appealing because pears and walnuts create a wonderfully seasonal combination. During warmer months, it can easily become a refreshing summer salad recipe when served chilled.
🔄 Variations
- 🍏 Apple Version: Replace some or all of the pears with crisp apples for a slightly sharper flavour.
- 🍇 Add Grapes: Halved seedless grapes bring extra sweetness to the pear and blue cheese salad.
- 🥑 Add Avocado: Diced avocado creates a softer, creamier texture.
- 🌱 Make It Vegetarian: Leave out the chicken and increase the walnuts or add chickpeas for extra substance.
- 🥬 Change The Greens: Substitute rocket with baby spinach, mixed leaves or watercress.
- 🌰 Try Pecans: Pecans make an excellent alternative to walnuts in this walnut salad recipe.
- 🍗 Use Leftover Chicken: Chilled roasted or grilled chicken works beautifully when you need an even quicker meal.
- 🍯 Sweeten Naturally: Replace some of the caster sugar with a small amount of honey for a softer dressing.
- 🧀 Milder Cheese: If traditional blue cheese feels too strong, choose a mild blue-veined cheese.
📋 Recipe At A Glance
- 🍽️ Recipe: Blue Cheese Pear Salad
- 👨👩👧👦 Serves: 6
- ⏱️ Preparation Time: Approximately 25 minutes
- 🔥 Cooking Time: Approximately 15–20 minutes
- 🕒 Total Time: Approximately 40–45 minutes
- 🥗 Course: Lunch, Dinner, or Starter
- 🌍 Style: Modern European-Inspired Salad
- 🍗 Main Protein: Poached Chicken
- 🍐 Calories: Approximately 590 kcal per serving, depending on the exact chicken, cheese, stock, and dressing quantities used.
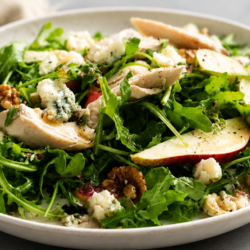
Blue Cheese Pear Salad Recipe
Equipment
- 1 Large deep frying pan
- 1 Large Salad Bowl –
- 1 Small Mixing Bowl
- 1 Whisk
- 1 Sharp Chef’s Knife
- 1 Large Chopping Board:
- 1 Slotted Spoon
- 1 Kitchen Paper:
Ingredients
For The Poached Chicken
- 1.2 kg chicken breasts
- 9 thyme sprigs
- 9 black peppercorns
- 3 garlic cloves
- 1½ lemons
- 1.125 litres chicken stock
For The Salad
- 120 g baby rocket
- 3 small Corella or Packham pears
- 150 g blue cheese
- 105 g walnuts
- 1½ tablespoons finely grated red onion
- Juice of ¾ lemon
- 3 tablespoons fresh thyme leaves
- 3 tablespoons caster sugar
- 90 ml olive oil
- Salt and freshly ground black pepper
Instructions
🥗 Step 1: Prepare The Poaching Liquid
- Place the chicken breasts in a large, deep frying pan.
- Add the thyme sprigs, black peppercorns, bruised garlic, strips of lemon zest, and chicken stock.
- Bring the liquid gently to the boil over medium-high heat.
- Once boiling, reduce the heat to medium.
- Cover the chicken with a round piece of baking paper and simmer gently for 5 minutes.
🔥 Step 2: Finish Cooking The Chicken
- Carefully turn each chicken breast over using tongs.
- Replace the baking paper and continue cooking for approximately 8 minutes, or until the chicken is completely cooked through.
- Remove the pan from the heat and allow the chicken to stand in the poaching liquid for 5 minutes.
- Remove the chicken with a slotted spoon and place it on kitchen paper to drain.
- Allow it to cool slightly before slicing or gently shredding into large strips.
- This gentle poaching method keeps the chicken tender and juicy, making it ideal for a Blue Cheese Pear Salad.
🍋 Step 3: Make The Dressing
- Place the finely grated red onion in a small mixing bowl.
- Add the fresh lemon juice, thyme leaves, and caster sugar.
- Pour in the olive oil.
- Whisk vigorously until the dressing is thoroughly combined.
- Season with salt and freshly ground black pepper.
- Taste and adjust the seasoning if necessary.
🍐 Step 4: Prepare The Pears
- Wash and dry the pears thoroughly.
- Cut each pear in half lengthways.
- Carefully remove the cores.
- Slice the pears thinly and evenly.
- Keep the slices together until you are ready to assemble the salad.
- Choose pears that are ripe and naturally sweet but still firm enough to retain their shape.
🌰 Step 5: Toast And Chop The Walnuts
- Place the walnuts in a dry frying pan over medium heat.
- Toast them for several minutes, stirring frequently until fragrant.
- Remove them from the heat as soon as they become lightly golden.
- Allow them to cool before roughly chopping.
- Take care not to burn the walnuts, as this can give the salad an unwanted bitter flavour.
🥗 Step 6: Assemble The Salad
- Place the baby rocket into a large salad bowl.
- Add the sliced pears, crumbled blue cheese, and toasted walnuts.
- Add the sliced or shredded poached chicken.
- Pour over the lemon and thyme dressing.
- Season lightly with salt and freshly ground black pepper.
- Gently fold everything together until evenly coated.
- Avoid vigorous tossing so the pear slices and blue cheese remain intact and visually appealing.
✨ Step 7: Serve Immediately
- Divide the Blue Cheese Pear Salad between six serving bowls or plates.
- Scatter over a few additional walnut pieces if desired.
- Finish with a little extra crumbled blue cheese.
- Serve immediately while the rocket is fresh and crisp.
Notes
- 🍐 Choose Firm-Ripe Pears: Select sweet, juicy pears that are firm enough to hold their shape when sliced and tossed into the salad.
- 🧀 Balance the Blue Cheese: Use a mild or medium-strength blue cheese if you prefer a gentler flavour, or choose a stronger variety for a bolder Blue Cheese Pear Salad.
- 🌰 Toast the Walnuts: Lightly toast the walnuts before adding them to enhance their natural flavour and create a delicious crunch.
- 🍗 Keep the Chicken Tender: Poach the chicken gently and avoid overcooking it to ensure the meat remains juicy and tender.
- 🍋 Dress Just Before Serving: Add the lemon and thyme dressing shortly before serving to keep the rocket fresh and crisp.
- 🥗 Toss Gently: Fold the ingredients together carefully so the pear slices and blue cheese remain intact and beautifully presented.
- 🌿 Use Fresh Herbs: Fresh thyme gives the dressing a brighter, more aromatic flavour than dried thyme.
- 🧊 Store Components Separately: If preparing ahead, keep the chicken, dressing, pears, walnuts, and salad leaves separate until you are ready to serve.
🧊 Storage Instructions
- 🥗 Assembled Salad: For the best texture, serve the Blue Cheese Pear Salad immediately after dressing.
- 🍗 Cooked Chicken: Refrigerate leftover cooked chicken promptly in an airtight container and use within 3–4 days, following standard food-safety guidance.
- 🍋 Dressing: Store leftover dressing separately in a sealed container in the refrigerator and whisk again before serving.
- 🌰 Walnuts: Keep toasted walnuts in an airtight container so they remain crisp.
- 🍐 Prepared Pears: Pears can brown after cutting, so prepare them close to serving time or lightly coat them with lemon juice.
- 🥣 Best Practice: Store the chicken, dressing, and salad components separately whenever possible.
The inspiration recipe also recommends straining and saving the poaching liquid as stock; it states that the strained liquid can be refrigerated for up to three days or frozen for up to one month.
📊 Nutritional Information
The figures below are approximate estimates for one serving of this six-serving version. Actual nutrition varies according to the size of the chicken breasts, type of blue cheese, amount of dressing consumed, and specific brands used.
| Nutrient | Approx. Per Serving | Approx. % Daily Value* |
|---|---|---|
| Calories | 590 kcal | 28% |
| Protein | 52g | 104% |
| Carbohydrates | 24g | 9% |
| Fat | 34g | 44% |
| Fibre | 5g | 18% |
| Sugars | 13g | 26% |
| Sodium | 700mg | 30% |
| Calcium | 180mg | 14% |
| Iron | 2mg | 11% |
Percentages are general estimates based on a 2,100-calorie daily diet and can vary considerably. The source recipe notes that its nutrition information is calculated from an ingredient database and should be considered an estimate.
💚 Health Benefits And Advice
- 🥬 Provides Vegetables: Rocket contributes fibre and micronutrients while adding freshness to the salad.
- 🍐 Contains Fruit: Pears provide naturally occurring sugars and dietary fibre.
- 🍗 Protein-Rich: Chicken contributes high-quality protein, helping make this healthy chicken salad more satisfying.
- 🌰 Includes Nuts: Walnuts provide unsaturated fats and plant-based nutrients.
- 🫒 Uses Olive Oil: Olive oil contributes predominantly unsaturated fat.
- 🧀 Enjoy Cheese In Moderation: Blue cheese adds calcium and flavour but can also contribute saturated fat and sodium.
- ⚖️ Balance Your Plate: Pair the salad with additional vegetables or a wholegrain side if you need a larger meal.
- 🚨 Check Allergens: This recipe contains milk and tree nuts and may contain other allergens depending on the ingredients used. The source recipe specifically flags tree nuts, milk, sulphites, and lactose.
Note: The information provided in this blog post is for educational purposes only and is not intended as medical advice. Always consult with a healthcare professional before making significant changes to your diet.
❓ Frequently Asked Questions
Q1. Can I Make Blue Cheese Pear Salad Without Chicken?
👉 Yes. Simply omit the chicken and add chickpeas, extra walnuts or another plant-based protein for a satisfying vegetarian version of this Blue Cheese Pear Salad.
Q2. What Pears Are Best For Blue Cheese Pear Salad?
👉 Corella and Packham pears work particularly well because they offer sweetness while maintaining enough firmness for slicing.
Q3. Can I Prepare Blue Cheese Pear Salad In Advance?
👉 You can prepare the chicken, dressing, and toasted walnuts ahead of time, but assemble and dress the Blue Cheese Pear Salad shortly before serving for the freshest texture.
Q4. What Blue Cheese Should I Use?
👉 Choose a mild blue cheese for a gentler flavour or a stronger variety if you enjoy a more pronounced tang.
Q5. Can I Use Leftover Chicken?
👉 Absolutely. Chilled leftover roast or poached chicken makes this Blue Cheese Pear Salad even quicker to prepare.
Q6. How Do I Stop Pears From Browning?
👉 Toss the sliced pears lightly with fresh lemon juice. This helps slow browning while adding a pleasant citrus note.
Q7. Can I Replace Walnuts?
👉 Yes. Pecans, hazelnuts, or toasted almonds can be used depending on your preference.
Q8. Is Blue Cheese Pear Salad Suitable For A Party?
👉 Definitely. Arrange the ingredients on a large platter and add the dressing shortly before serving for an impressive presentation.
Q9. Is This A Healthy Salad?
👉 It can form part of a balanced diet because it combines fruit, leafy greens, lean protein and nuts, although blue cheese and dressing can contribute significant calories, fat and sodium.
Q10. What Makes This Blue Cheese Pear Salad Special?
👉 The contrast between sweet pear, tangy cheese, peppery rocket, crunchy walnuts and tender chicken gives the Blue Cheese Pear Salad several layers of flavour and texture in every bite.
🌟 Final Thoughts
A great salad does not need dozens of ingredients or complicated cooking techniques. This Blue Cheese Pear Salad proves that a carefully chosen combination of fresh produce, quality cheese, crunchy nuts and tender chicken can create something genuinely memorable. The sweetness of the pears, the boldness of the cheese and the freshness of the rocket work together beautifully.
If you are looking for healthy salad recipes, an impressive pear salad recipe or a simple dish for entertaining, this Blue Cheese Pear Salad is an excellent choice. It is colourful enough for a celebration, practical enough for a weekday lunch, and satisfying enough to serve as a complete meal.
Most importantly, this Blue Cheese Pear Salad gives you plenty of room to make the recipe your own. Adjust the cheese, experiment with nuts, swap the greens or use leftover chicken. However you serve it, the combination of sweet, creamy, crunchy and savoury flavours makes this Blue Cheese Pear Salad a delicious addition to your collection of delicious salad recipes. For the original flavour inspiration and cooking method, see the source recipe from Taste.
- Amazing Salad Recipes: 120+ Fresh & Healthy Ideas to Try Today🥗
- 47 Delicious High-Protein Recipes for All-Day Energy and Strength💪🥑
- Ultimate Delicious Shawarma Recipes You’ll Crave Daily 🌯✨
- 180+ Garlic Recipes: The Irresistible Flavour-Packed Guide You’ll Love🧄🌟
- Salsa Recipes: Delicious, Flavorful Guide You’ll Absolutely Love🌟🍅🌶️

Did you make this recipe? Please do leave a comment and rating on the blog. Tag us on Pinterest @9jakitchen and Instagram @real9jakitchen and follow.