Discover this sensational & easy “how to make pickled carrots” recipe that gives you tangy, crunchy delights in minutes. Ideal for snacks, sandwiches & salads — your new favourite veggie upgrade!
🥕 Introduction
If you’ve ever wondered how to make pickled carrots, you’re in for a treat! This flavour-packed, crunchy veggie side is not only vibrant and tasty but incredibly versatile. Whether you’re prepping a colourful snack for lunch, garnishing salads, or adding a zing to sandwiches, learning how to make pickled carrots will elevate your kitchen game. In this blog post for 9jaKitchen.com, we’ll walk you through the full process of making homemade pickled carrots, share insider tips for the best results, explore variations, and dive into the health benefits behind this tangy treat.
Table of Contents
❤️ Why You’ll Love This Recipe
- Quick and simple — anyone can learn how to make pickled carrots!
- You’ll get that irresistible crunch and bright colour that lifts any dish.
- Making homemade pickled carrots means you control the ingredients – less preservatives, more flavour.
- They store well and become a go-to condiment, snack or side dish.
- Whether you serve them with grilled meats, wraps, or in salads, these crunchy pickled carrots bring a juicy pop of flavour and texture.
🧾 Ingredients needed (Detailed)
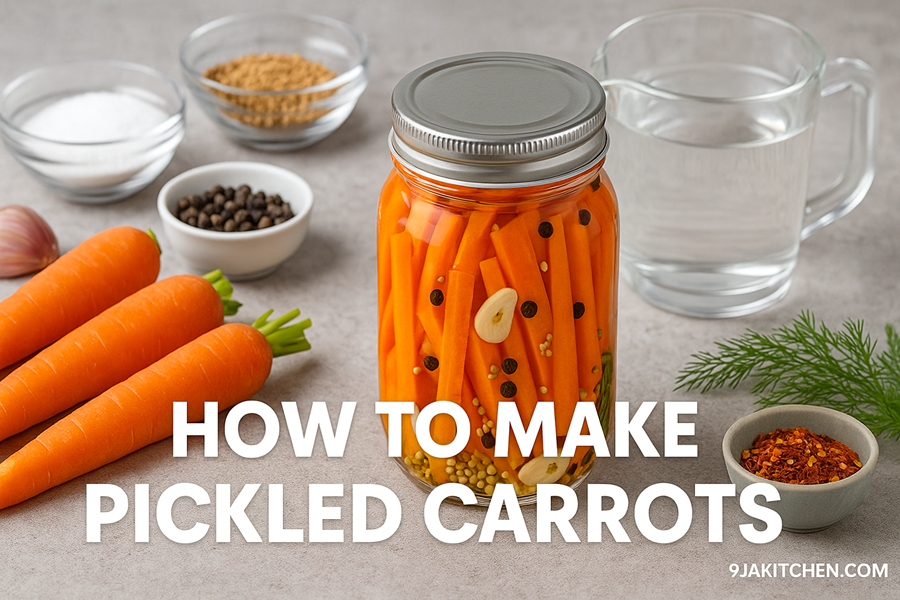
To master how to make pickled carrots, you’ll need:
- 500 g fresh carrots, peeled and trimmed (about 4-5 medium carrots)
- 1 cup (240 ml) white vinegar (or apple cider vinegar for a milder taste)
- ½ cup (120 ml) water
- 2 tablespoons granulated sugar
- 1 tablespoon sea salt (non-iodised if possible)
- 2 garlic cloves, thinly sliced
- 1 teaspoon black peppercorns
- ½ teaspoon mustard seeds
- Optional: ¼ teaspoon red chilli flakes (for a spicy kick)
- Optional: fresh dill sprigs or coriander for additional aroma
- Optional: 1 small bay leaf
🥄 Equipment needed
- A sharp knife and cutting board (to peel and slice carrots)
- A large heatproof bowl or pan (to heat brine)
- A clean 1-liter (or 1-quart) glass jar with a tight-fitting lid (for storing the pickled carrots)
- A small saucepan (to bring the brine to a boil)
- A measuring cup and spoons
- A wooden spoon or spatula
- A funnel (optional but helpful for transferring brine into the jar without spilling)
These simple tools make how to make pickled carrots straightforward and mess-free.
🔪 Step-by-Step Guide / Cooking Instructions
Step 1: Prepare the Carrots 🥕
- Trim and Slice for Consistent Size
- Peel, trim and slice the carrots into sticks (5-6 cm long, 0.5 cm thick) or rounds for salads.
- Uniform slicing ensures even pickling and crisp texture.
Step 2: Sterilise the Jar 🧴
- Keep It Clean and Germ-Free
- Sterilise your glass jar and lid by washing with hot soapy water, rinsing well, and air-drying.
- Alternatively, dip briefly in boiling water.
- This step keeps your pickled carrots fresh longer.
Step 3: Make the Pickling Brine 🧂
- Mix the Perfect Balance of Sweet and Tangy
- In a small saucepan, combine vinegar, water, sugar and salt.
- Heat gently until everything dissolves.
- Remove from heat and let cool slightly.
Step 4: Layer the Flavours 🌿
- Add Spices and Herbs for Depth
- Place garlic slices, peppercorns, mustard seeds, chilli flakes, dill sprigs or bay leaf at the bottom of the clean jar.
- These aromatics will infuse delicious flavour into the carrots.
- These flavours define how to make pickled carrots taste extraordinary.
Step 5: Pack the Carrots into the Jar 🫙
- Neat Arrangement for Maximum Crunch
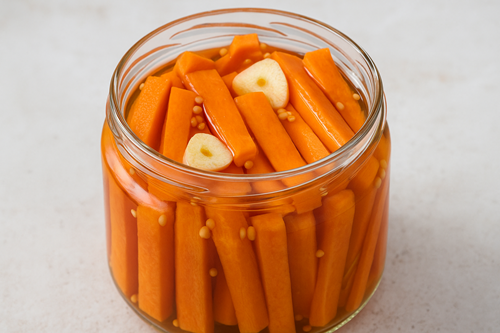
- Pack the sliced carrots tightly and vertically into the jar.
- Don’t overfill; leave a little room at the top so brine can circulate evenly.
Step 6: Pour the Hot Brine 🍶
- Cover Completely for Safe Pickling
- Using a funnel, pour the warm brine over the carrots until fully submerged.
- Add a little warm water if necessary. Ensure no carrot is above the liquid line.
Step 7: Seal and Cool 🧊
- Lock In the Flavour
- Seal the jar immediately and let it cool to room temperature.
- The vacuum seal forms as it cools, helping preserve the carrots.
Step 8: Refrigerate and Pickle 🕒
- Allow Time for the Magic to Happen
- Refrigerate for at least 2 hours for a mild flavour.
- For optimal tang and crunch, let the jar rest 24 hours before opening.
- The longer you wait (up to a week), the more flavourful your pickled carrots become.
Step 9: Store and Enjoy 🍴
- Serving and Shelf Life
- Once open, store in the fridge and consume within 2-3 weeks.
- Each bite will deliver the perfect combination of crisp, tangy, and aromatic goodness!


🎯 Tips for a Perfect Result
- Use fresh, firm carrots without blemishes for maximum crunch.
- Slice carrots uniformly so that the pickling brine penetrates evenly.
- Don’t skip the sugar entirely – it balances the vinegar and salt for a more pleasurable flavour.
- If you like extra crunch, you can shock the carrot sticks in ice water for 5 minutes after slicing and before pickling.
- Let the brine cool slightly so you don’t crack the jar, but pour while still warm to help flavour infusion.
- Always ensure the carrots are fully submerged in brine to prevent mould.
- Label the jar with the date made; first in, first enjoyed.
- If you prefer lower sodium, you can reduce salt slightly—but be cautious, salt is part of preservation.
- For clear brine and prettier results, use filtered water and avoid overcrowding the jar.
🍽️Serving Suggestion
Serve your crunchy homemade pickled carrots alongside laid-back dishes:
- As a tangy side to grilled chicken, fish or jerk meat.
- Toss into a salad for texture and acid pop.
- Layer into a sandwich or wrap for vibrant colour and crunch.
- Serve them on a cheese platter or mezze board for extra zing.
- Enjoy as a snack straight from the jar with a few toothpicks!
🔄 Variations You’ll Love
- Spicy edition: Increase chilli flakes to ½ teaspoon, add thin slices of jalapeño or fresh chilli for a fiery version of pickled carrots.
- Asian-inspired: Replace mustard seeds with a star anise and 1 teaspoon sesame oil after pickling for an umami twist.
- Herb-infused: Add fresh dill or coriander sprigs and a little lemon peel to the jar for a herbaceous taste.
- Sweet pickled carrots: Increase sugar to ¼ cup and add a cinnamon stick or cardamom pods for a sweet-savoury profile.
- Fermented version: Instead of vinegar brine, use a salt-water brine (about 2 % salt by weight) and allow carrots to ferment at room temperature for 2-3 days for probiotics and tangy depth. (Note: this shifts from quick pickling to true fermentation.)
📊 Nutritional Information (Approximate per Serving)
(Estimated for about 50 g pickled carrots using vinegar brine)
| Nutrient | Amount |
|---|---|
| Calories | ~27 kcal |
| Total Carbohydrates | ~6.4 g |
| Dietary Fiber | ~0.9 g |
| Sugars | ~5 g |
| Protein | ~0.2 g |
| Fat | ~0.1 g |
| Sodium | Varies (can be high) |
| Vitamin A / Beta-Carotene | Significant (due to carrots) |
🔗 Source: USDA FoodData Central – Carrot↗
🌿 Health Benefits and Advice
The simple act of learning how to make pickled carrots brings more than just flavour—it brings healthful nutrition too. Carrots are rich in beta-carotene, which converts to vitamin A in the body and supports eye health, immunity and skin health. The pickling process retains much of this benefit while adding the tang and crunch. Furthermore, pickled vegetables (especially if fermented) can support gut health by introducing probiotics and beneficial bacteria.
However, it’s important to moderate intake because pickled vegetables often contain higher levels of sodium due to the brine. So if you’re monitoring your salt intake or have high blood pressure, opt for lower-sodium versions and enjoy in moderation. The homemade route (as in this recipe) gives you better control.
Note: The information provided in this blog post is for educational purposes only and is not intended as medical advice. Always consult with a healthcare professional before making significant changes to your diet.
❓ Frequently Asked Questions
Q: How long do homemade pickled carrots last?
👉When stored in the fridge in a sealed jar, they generally last up to 2-3 weeks. After that, the texture softens and the flavour intensifies.
Q: Can I use other types of vinegar instead?
👉Yes, absolutely. You can use apple cider vinegar or even rice vinegar for a milder flavour. Just keep the ratio of vinegar to water similar.
Q: Do I have to cook the carrots first?
👉No. In this quick pickling method, you don’t blanch the carrots. Their crunch is maintained by the brine. If you prefer softer carrots, you can blanch for 1-2 minutes before pickling.
Q: Can I pickle carrots without sugar?
👉Yes, you can reduce or omit sugar, though it will alter the flavour. Sugar helps balance acidity and salt. If sugar-free, you might want to add a little natural sweetener or adjust the seasoning.
Q: What’s the difference between quick-pickled carrots and fermented pickled carrots?
👉Quick-pickled carrots use vinegar and are ready within hours; fermented carrots use a salt-water brine and rely on natural bacteria over days to weeks, offering probiotics.
🧡 Final Thought
Mastering how to make pickled carrots is a game-changer for your kitchen. In just a little time and with simple ingredients, you’ll have a flavour-packed, crunchy, vibrant addition to snacks, meals or sides. Whether you keep it basic or explore spicy or herbaceous variations, homemade pickled carrots elevate ordinary veggies into extraordinary eats. Try it once and you’ll likely find they become a staple in your fridge—ready to lift salads, sandwiches, snacks or gatherings. Enjoy the tangy crunch and happy pickling!
- How To Make Obe Eja Fish Stew – A Powerful, Delicious, And Comforting Nigerian Classic 🍲🔥
- How To Make Obe Ata Dindin – A Powerful, Joy-Filled And Irresistibly Delicious Nigerian Pepper Sauce 🌶️🍅
- How To Make Tomato Pepper Stew – The Ultimate Delicious Power Recipe You’ll Love🌶️🍅
- How To Make Ofe Ose-Ani: A Powerful, Comforting & Authentic Igbo Soup You’ll Love🍲
- How To Make Omoebe (Edo Black Soup): A Delicious, Powerful, And Comforting Traditional Delight 🍲✨

Did you like this article? Please do leave a comment and rating on the blog. Follow us on Instagram @real9jakitchen


