How to make Kimchi Fried Rice: discover a quick, flavourful Korean rice dish recipe with tips, equipment list, nutritional info, and FAQs. Perfect for home cooks craving comfort food.
Introduction✨
How to make the best kimchi fried rice is a question every food lover should ask when searching for a dish that’s both comforting and bold. 🌶️ This classic Korean fried rice is the ultimate combination of tangy, spicy kimchi and warm, fluffy rice. It’s simple, affordable, and deeply satisfying—exactly what you crave when you need comfort in a bowl. Whether you’re whipping it up for a quick weeknight dinner or sharing it with loved ones, kimchi fried rice never disappoints.
In this recipe, you’ll discover the essential steps, expert tips, and heartwarming flavours that turn a humble plate of fried rice into something unforgettable.
Table of Contents
🍚 What is Kimchi Fried Rice / Kimchi Bokkeumbap?
Kimchi fried rice (김치볶음밥, kimchi bokkeumbap) is a popular Korean fried rice dish made by stir-frying cooked rice with kimchi, aromatics, optional protein, and sauces↗.
It’s beloved for its simplicity, bold flavour, and versatility. Because it’s easy to adjust seasoning, mix-ins, and heat levels, many call it a staple in Korean home cooking.
Why You’ll Love This Recipe ❤️
- Bold, spicy, and tangy flavours balanced with savoury rice
- Quick to make—ready in 20 minutes
- Budget-friendly and uses leftover rice
- Easily customizable with protein or vegetarian options
- Comfort food that warms the soul
Ingredients You’ll Need🥢
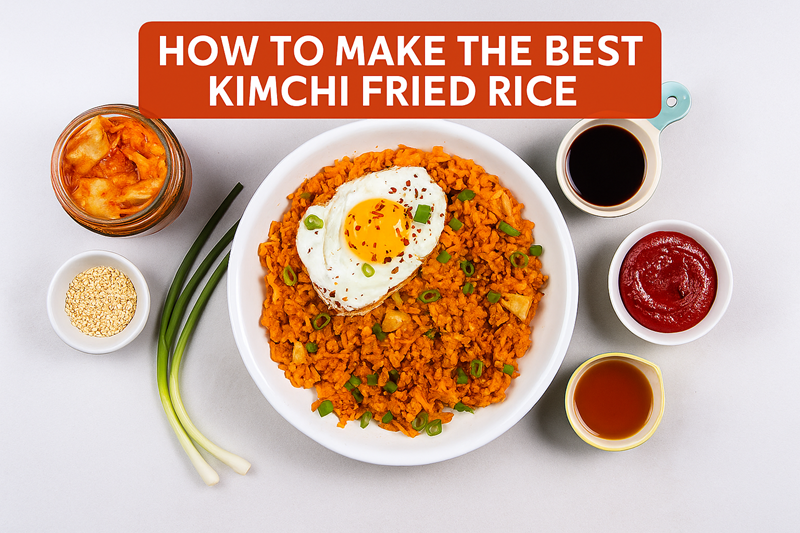
- 2 cups cooked cold rice (preferably day-old)
- 1 cup kimchi, chopped (with 2–3 tbsp kimchi juice)
- 1 tbsp gochujang (Korean chilli paste)
- 1 tbsp soy sauce
- 2 tsp sesame oil
- 1 tbsp neutral oil (vegetable or canola)
- ½ cup green onions, sliced
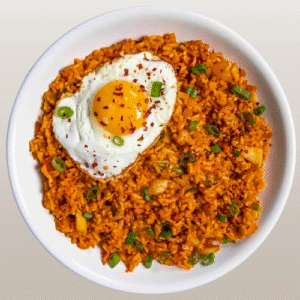
- 1 egg per serving (fried sunny side up) 🍳
- Optional proteins: spam, pork belly, chicken, or tofu
- Sesame seeds for garnish
Equipment You’ll Need 🍳
- Wok or large nonstick skillet
- Wooden spatula or silicone spatula
- Sharp knife
- Cutting board
- Measuring spoons & cups
- Serving bowls
Step-by-Step Instructions🙋🏽♀️
Step 1: Prep Your Rice 🍚
- Cold rice works best for fried rice because it prevents clumping.
- If using fresh rice, spread it on a tray and let it cool for 30 minutes before cooking.
Step 2: Heat the Wok 🔥
- Place your wok or skillet over medium-high heat.
- Add neutral oil and allow it to shimmer.
Step 3: Sauté the Kimchi
- Add chopped kimchi and a bit of kimchi juice. Stir-fry for 2–3 minutes until fragrant and slightly caramelized.
- This deepens the flavour of the dish.
Step 4: Add Seasonings
- Mix in gochujang and soy sauce.
- Stir well to coat the kimchi with spicy, savoury notes.
Step 5: Stir-Fry the Rice
- Add the cold rice to the wok.
- Break up clumps with your spatula and toss everything together until evenly coated with kimchi sauce.
Step 6: Drizzle Sesame Oil
- Once the rice is hot and fragrant, drizzle in sesame oil for nuttiness.
Step 7: Fry the Egg 🍳
- In a separate pan, fry eggs sunny side up.
- The runny yolk adds creamy richness when mixed into the spicy rice.
Step 8: Serve and Garnish 🌿
- Scoop kimchi fried rice into bowls, top with fried egg, and sprinkle with green onions and sesame seeds.
- Serve hot and enjoy!


Kimchi Fried Rice
Tips for the Best Kimchi Fried Rice 🌟
- Use day-old (cooled) rice so grains are firmer and less likely to clump.
- Use well-fermented kimchi (older kimchi gives better tang).
- Don’t overload the pan: keep a bit of space so ingredients stir well.
- Let part of the rice crisp up by pressing onto the hot pan before stirring.
- Adjust spiciness using gochujang or omit if you prefer milder.
- Add extra vegetables (peas, carrots, bell pepper) for colour & nutrients.
- Add a dash of sugar or mirin to balance acidity if the kimchi is too sour.
- Serve immediately—kimchi fried rice is best eaten hot.
- If storing leftovers, reheat in a skillet (not microwave only) to retain texture.
Variations to Try ✨
- Vegetarian Kimchi Fried Rice: Use tofu and extra veggies like mushrooms or zucchini.
- Cheesy Version: Melt mozzarella on top for gooey, comforting goodness.
- Spicy Fried Rice Recipe: Increase gochujang and sprinkle chilli flakes.
Nutritional Information (Approx. per Serving)📊
| Nutrient | Amount |
|---|---|
| Calories | ~420 |
| Protein | 10g |
| Fat | 14g |
| Carbohydrates | 60g |
| Fiber | 4g |
| Sodium | 920mg |
Source: Verywell Fit Recipe Nutrition Calculator↗
Frequently Asked Questions (FAQs)🙋🏽♀️
Q1: Can I use brown rice or quinoa instead?
👉A: Yes — brown rice works, though the texture will be chewier and cook time may vary. Quinoa is possible, but the flavour profile shifts a lot.
Q2: Is kimchi fried rice vegetarian or vegan?
👉A: It can be. Just omit meat and egg, use tofu or mushrooms instead. Ensure your kimchi doesn’t contain fish sauce or shrimp paste.
Q3: Why is my dish too soggy?
👉A: Likely too much kimchi juice or water in the rice. Use less liquid and more crisping time in the pan.
Q4: Can I make it ahead and reheat?
👉A: You can, but the texture may soften. Reheat in a hot pan with oil to revive some crispness.
Q5: How spicy is it?
👉A: That depends on your kimchi and the amount of gochujang. You can adjust to your preference.
You said:
- How To Make Yam And Vegetable Stir-Fry – A Delicious Power-Packed Feel-Good Meal🫛🥔
- How To Make Yam And Plantain Pepper Soup: A Delightful, Powerful & Comforting Nigerian Classic 🌶️🍠🍌
- 🌟 How To Make Yam And Vegetable Pepper Soup (A Comforting & Powerful Delight)
- 🌟 How To Make Yam And Cow Leg Pepper Soup (A Delicious Power-Packed Nigerian Classic)
- How To Make Yam And Goat Meat Pepper Soup – A Delicious Power-Packed Nigerian Comfort Meal 🍲🔥

Did you make this recipe? Please do leave a comment and rating on the blog. Tag us with your picture on Instagram @real9jakitchen


