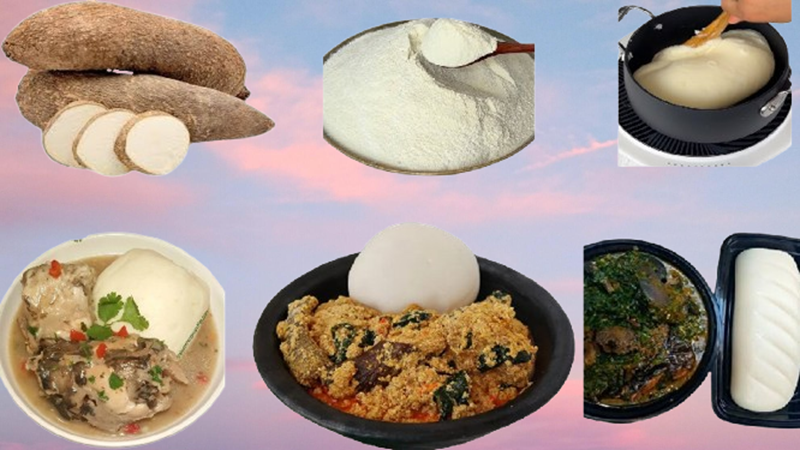
Introducing Pounded Yam Flour
Pounded yam flour, often called “instant yam flour” or “yam flour,” is a convenient, shelf-stable alternative to the labour-intensive traditional pounded yam. It is a staple in many West African homes, loved for its smooth, stretchy texture and ability to pair with various soups and stews. Making yam flour from scratch requires careful selection of yams, proper processing, and drying techniques to ensure a high-quality, long-lasting product.
Table of Contents
Below is an extensive guide on how to make pounded yam flour at home or on a small scale.
Equipment Needed
- Sharp knife and vegetable peeler
- Large basin or bowls
- Clean water
- Grater or yam pounding mortar and pestle
- Sieve or cheesecloth (optional)
- Food dehydrator, oven, or sun-drying setup
- Grinder or high-powered blender/mill
- Airtight containers for storage
Ingredients:
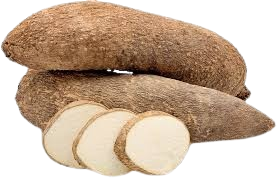
- Fresh white yam tubers (Dioscorea rotundata is preferred)
Step-by-Step Process
Step 1: Selection of Yams
- Choose Mature Yams: Select firm, mature, and healthy yams without bruises, rot, or mold. The quality of the yam directly affects the quality of the final flour.
Step 2: Washing and Peeling
- Wash Thoroughly: Rinse the yams under running water to remove dirt and sand.
- Peel: Use a sharp knife or peeler to remove the thick brown skin.
Step 3: Slicing
- Cut into Thin Slices: Slice the yam tubers into thin, even pieces (about 1/4-inch thick). Thinner slices dry more quickly and evenly.
- Rinse Again: Place the slices in a bowl of clean water to prevent browning and remove excess starch.
Step 4: Blanching (Optional)
- Blanching: To preserve colour and reduce microbial load, briefly immerse the yam slices in hot water (about 70–80°C) for 3–5 minutes, then drain and cool. This step is optional but recommended for better shelf life and colour.
Step 5: Drying
- Sun Drying: Arrange the yam slices in a single layer on clean trays or mats. Place them in direct sunlight, covering with a mesh or cloth to keep out insects. Dry for 2–4 days, turning occasionally until they are crisp and brittle.
- Dehydrator/Oven: Alternatively, use a food dehydrator or oven set at 60–70°C (140–160°F) for 8–12 hours. Properly dried yam chips should snap easily.
Step 6: Milling/Grinding
- Grind to Powder: Once thoroughly dried, grind the yam slices into a fine, smooth flour using a grain mill, blender, or commercial grinder. Sift the flour to remove any large particles and achieve a uniform texture.
Step 7: Packaging and Storage
- Cool Completely: Ensure the flour is fully cooled to room temperature before packaging.
- Airtight Storage: Store the yam flour in airtight containers or resealable bags to prevent moisture absorption.
- Keep in a Dry Place: Place in a cool, dry, and dark location. Properly dried and stored yam flour can last for 6–12 months.
Tips for the Best Results
- Avoid Moisture: Any moisture during storage can lead to spoilage or mould growth.
- Hygiene: Use clean equipment and surfaces throughout to ensure safety and quality.
- Texture Check: Sift the flour twice for extra smoothness, especially if using it for classic pounded yam dishes.
How to Prepare Pounded Yam from Yam Flour
- Boil water in a pot.
- Gradually add yam flour, stirring vigorously to prevent lumps.
- Continue stirring until a smooth, stretchy dough forms.
- Cover and allow to steam for a few minutes, then stir again before serving.
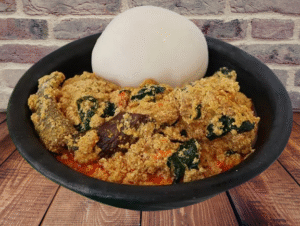
Pounded yam served with egusi soup
By following these steps, you can produce high-quality pounded yam flour at home, ensuring a fresh, preservative-free staple that is always ready for use. This process can also be scaled up for small commercial production with appropriate equipment.
- How To Make Yam And Vegetable Stir-Fry – A Delicious Power-Packed Feel-Good Meal🫛🥔
- How To Make Yam And Plantain Pepper Soup: A Delightful, Powerful & Comforting Nigerian Classic 🌶️🍠🍌
- 🌟 How To Make Yam And Vegetable Pepper Soup (A Comforting & Powerful Delight)
- 🌟 How To Make Yam And Cow Leg Pepper Soup (A Delicious Power-Packed Nigerian Classic)
- How To Make Yam And Goat Meat Pepper Soup – A Delicious Power-Packed Nigerian Comfort Meal 🍲🔥

Did you make this recipe? Please do leave a comment and rating on the blog. Tag us with your picture on Instagram @real9jakitchen

